About 1 in 60 insured residential properties in the U.S. has a property damage claim related to either water damage or freezing. A home with a bad interior basement drainage system can get water damage. To solve this problem, install a durable and cost-effective drainage system.
An interior basement drainage system is a series of pipes and drains that collect water from the basement floor and walls and direct it to a sump pump. The sump pump then pumps the water out of the basement and away from your home. If you’re thinking about installing this kind of drainage system, we’ll walk you through the process of choosing one in 10 simple steps:
Step 1: Assess Your Needs
You should assess your basement’s needs when choosing an interior basement drainage system for various reasons. Doing this can help you choose the right type of system. Different types of interior basement drainage systems are available, each with advantages and disadvantages.
When you consider your needs, you can find the right size of the drainage system. The ideal size will depend on the size of your basement and the severity of your water problem. A system that’s too small won’t handle all the water, and a system that’s too large will be expensive and wasteful.
To assess your basement’s needs, figure out how much water your basement gets. It can help determine the size and capacity of the drainage system you need. To do this, pay attention to the weather, check the basement after heavy downpours, or install a water meter.
You should also look at the source of the water. With this assessment, you can find the type of drainage system that’s best for you. For example, if the water comes from cracks in the foundation, you’ll need a system to collect and remove water from the foundation walls.
Besides considering the above factors, inspect your basement for signs of water damage. These signs may include mold, mildew, and cracks in the foundation walls and floor. You should also pay attention to where the water collects in your basement to determine the location of the drainage system.
Step 2: Set a Budget
A budget can help you see where your money goes when getting the drainage system. It can help you identify areas where you can cut back on spending. You can also count on it to avoid debt by spending less money and reduce stress by giving you control over your finances.
Interior basement drainage systems can differ in purchase and installation costs. The price varies with the size and complexity of the system, as well as the materials used and the labor costs of installation. So, you should set a budget before shopping to avoid overspending.
Your budget for the drainage system should factor in various costs. These costs include the cost of all the materials needed for the project. Since you won’t do the work yourself, budget for the cost of labor, which includes the cost of hiring a contractor and any other workers needed.
It is always a good idea to budget for unexpected expenses. These expenses could include things like finding unexpected damage to your home or having to buy additional materials. Once you set a budget, you can approach contractors for quotes.
Step 3: Get Quotes From Multiple Contractors
Once you know what you’re looking for and how much you’re willing to spend, it’s time to get quotes from multiple contractors. Get quotes for different types of drainage systems and from different contractors. The quotes will help you understand the price range for different types of systems and find the best deal.
When you’re getting quotes from contractors, be sure to explain your specific needs. Do this to help them give you an accurate quote. Inform the contractor about your budget and when you need them to complete the project.
You should also ask the contractor about their experience with basement drainage systems. Ensure that you’re hiring a qualified contractor for interior waterproofing. Remember to get a quote in writing to protect you in case of any problems with the installation.
Step 4: Compare the Quotes
When comparing quotes, look at the price, the type of system offered, and the warranty. You should also look at the contractor’s license and insurance to determine if they cover the project. Do this to ensure that you’re getting the best possible deal and hiring a qualified contractor.
Other factors to consider here are references from previous customers, customer service, and overall feeling. References from previous customers and customer service can help you gauge the contractor’s reputation. You should also choose a waterproofing contractor you feel comfortable with and trust.
As you compare price quotes, ensure that all the contractors are bidding on the same scope of work. See what they’re offering for the same scope of work. Doing this will help you choose the contractor with the best value for your money.
Step 5: Weigh Your Options for the Drainage System
Once you compare the quotes, choose a system that suits your basement and will meet your needs. Your options will include French drains, sump pump systems, and combination systems. Each uses different mechanisms for wall waterproofing.
French drains consist of a perforated pipe buried in a trench. The trench has gravel to allow water to flow into the pipe. Also, the pipe discharges into a storm drain or sump pump.
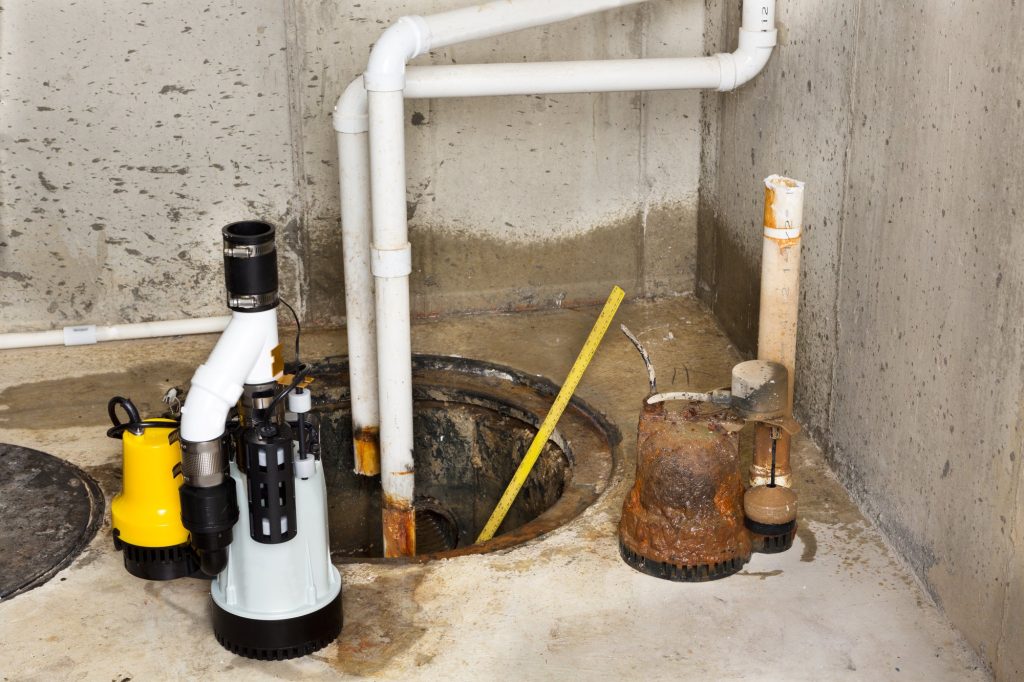
Sump pump systems consist of a sump pump installed in a sump pit. The sump pit is a hole in the basement floor that collects water. When the sump pit fills with water, expect the sump pump to turn on and pump the water out of the basement.
Combination systems combine the features of French drains and sump pump systems. The French drain collects water from a large area, while the sump pump removes the water quickly. As such, these systems are the most effective at removing large amounts of water from basements.
A contractor can help you choose an interior drainage system. They have the experience and expertise to assess your basement and recommend the best system. To do this, they’ll inspect your basement to identify the source of the water problem and to determine the severity of the problem.
Step 6: Know When to Schedule the Installation
You should schedule the installation for the interior basement drainage system at a convenient time for you and your household. The installation process can take a few days. So, choose a time when you’ll be home to supervise it and answer any questions the contractor may have.
It’s best to have an interior basement drainage system installed during the warmer months of the year. Doing this will give the concrete time to dry properly before the winter months arrive. If you have other commitments, schedule the installation beforehand to avoid scheduling conflicts.
After choosing a contractor, you can contact them to schedule an installation service by phone, email, or online. The contractor will need your name, contact information, and address. They may also need to know about the type of system you want and the size of your basement to process your request.
Ask about the contractor’s availability since some have busier schedules than others. Scheduling the service during the off-season may help you get a better price. Get everything in writing to avoid misunderstandings and keep the contractor accountable.
Step 7: Learn How to Prepare Your Basement for Installation
Before the installation, you’ll need to prepare your basement. The prep work may involve removing furniture and other belongings and clearing away debris. It’ll make the installation process more efficient and accurate.
Removing any belongings from the basement and cleaning it will give the contractor easy access to the work area. You should also disconnect any utilities in the basement for the same effect. These utilities include electricity, gas, and water.
If you have any valuables stored in your basement, protect them from dust and damage. Cover the basement floor with a tarp to protect it from dust and debris. Since the installation can create a lot of dust, provide a ventilation source to help keep the air clean.
You should also ensure the basement is well-lit. The contractor will need to be able to see well and install the basement waterproofing system correctly. Use many basement lighting sources to create a more even light distribution and place them in areas where the contractors will be working.
Step 8: Seek Insights on the Installation Process
The installation process will vary with the type of system you choose. The contractor will start by marking the location of the drainage pipes on the basement floor and walls. They will then cut trenches in the floor and walls to accommodate the drainage pipes.
Expect the contractor to install the drainage pipes in the trenches and connect them to a sump pump. Afterward, they will then backfill the trenches and seal the concrete. The contractor will also test the drainage system to ensure it’s working properly.
Once you’re familiar with this process, you can choose a good interior basement drainage system. You can even ask more informed questions about the different types of systems and the installation process. With this information, choosing a system that is right for your needs and budget is easier.
Step 9: Look Into the System’s Testing Requirements
Testing helps ensure that the drainage system for waterproofing walls is working properly. You’ll have to run some water into the basement during this stage. Doing this will help you determine if the system can collect and remove the water.
If the system works properly, the water should flow to the drainage pipes and the sump pump. The sump pump should then pump the water out of the basement and away from your home. If you notice any problems with the system, such as water pooling on the floor or the sump pump not working properly, contact the contractor who installed the system immediately.
It’s advisable to test the system during a heavy rain storm. This way, you can test the system’s ability to handle a large volume of water. You’ll also have to test the system’s backup sump pump if a power outage occurs and the alarm system to ensure it goes off if the pump fails.
Step 10: Consider the Maintenance Requirements
To ensure the system works correctly and avoid expensive repairs, consider its maintenance needs. Find out how often the system needs cleaning. Since some systems need more frequent cleaning than others, choose a system that requires less frequent cleaning if you have a lot of debris in your basement.
Figure out if the system requires any special tools or equipment to clean. Some systems need special tools or equipment to clean, which can add to the cost of maintenance. You may also find some systems with parts that you should replace regularly, adding to the maintenance
cost.
Maintaining the interior basement drainage system is important to prevent it from clogging, failing, or corroding. A clogged or faulty drainage system can lead to water damage in the basement, which can be costly. Maintenance includes activities such as cleaning and checking for leaks.
You can clean the drains and sump pump using a drain snake. A mix of baking soda and vinegar carefully poured onto the drains, and a sump pump can also help. To avoid harm to the system and the environment, don’t use strong chemicals to clean drains and sump pumps.
If you need help with your basement drainage system, contact a contractor. The contractor can inspect your system to identify problems such as clogs, leaks, or corrosion, and clean and repair it. They can also give you a maintenance schedule to help extend the system’s lifespan and prevent costly problems.
Need an Interior Basement Drainage System?
Choosing an interior basement drainage system can be daunting since there are several factors to consider. These factors include the size of the basement, water exposure, water type, and budget. Choose a system from a trusted manufacturer and have a qualified contractor install it.
Don’t let water damage ruin your home. Choose Armored Basement Waterproofing for your basement waterproofing, crawlspace encapsulation, and foundation crack repair needs. Take advantage of our free inspection to experience the Armored Basement Waterproofing difference.